

.png)


Overview
Email OTP authentication with Firebase in FlutterFlow allows users to securely verify their identity using a one-time password sent to their email. This process involves configuring Firebase for email authentication, generating and sending OTPs, verifying user input, and handling authentication states within FlutterFlow.
Prerequisites
- FlutterFlow
- Firebase
- Cloud Function
- Custom Action
Flutterflow
FlutterFlow is a low-code development platform built on top of Flutter, Google's open-source UI toolkit for building natively compiled applications for mobile, web, and desktop from a single codebase.
To set up your Flutterflow project, please follow the steps below:
Create a Flutterflow project
- Go to the Flutterflow console.
- Click on Create a project and follow the instructions to set up a new project.
Firebase Project Setup
Firebase is a Google platform offering tools to build, improve, and scale apps across mobile, web, and desktop, with services like real-time databases, authentication, and serverless backend solutions.
To set up your Firebase project, please follow the steps below:
1. Create a firebase project
- Go to the Firebase Console.
- Click on Create a project and follow the instructions to set up a new project.
.png)
2. Enable Firebase Authentication
- In the Firebase console, go to the Authentication section.
- Click Get Started and enable the sign-in methods you need (e.g., Email/Password, Google).
.png)
- Also enable the Email link (passwordless sign-in) and save.
.png)
- Now copy the project ID and go in the settings of flutterflow project, select firebase project and paste the copied firebase project id in that and connect with firebase.
.png)
Now our flutterflow and firebase projects are setup. Let’s start the to add passwordless functionality in our fluterflow project.
Please follow the below steps : -
Step 1 : - In flutterflow we have created 3 simple pages :
- Auth Page : - in this page user enter their email address and press ‘Sign In’ button. The use of this page is send OTP( One Time Password ) to user email address.

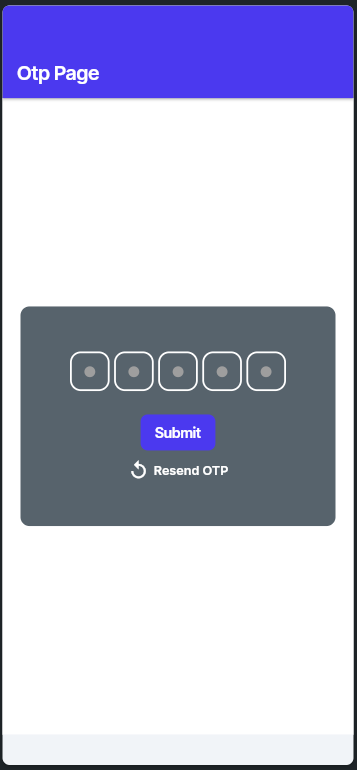
- Otp Page : - User will get otp in their email address, in this page they just need to enter the otp and press the ‘Submit’ button.
- Home Page : - This is a logged in page, user will jump here when they logged in successfully.
.png)
Step 2 : - Download service account private key.
Project setting → Service accounts → Generate new private key.

Service account private key will be downloaded in your system as a json file, in my case it is downloaded as mytesting-7cae3-firebase-adminsdk-bg0ir-1e888126db.json, which we will use in our cloud function.
Cloud Function
Note : - For initial steps to create cloud function, check the below article
https://www.flutterflowdevs.com/blog/how-admin-can-change-password-of-other-authenticate-users
If you have followed the steps in the given article, a functions folder should have been created on your system. Now, proceed with the steps below
Step 1 : - Open the folder in vs code.

Step 2 : - Add the service account private key ( json file which you already downloaded ) in the same folder(FUNCTIONS). same as we added.

Step 3 : - Create .env file in the same folder.

This file contains an email id and password

GMAIL_EMAIL=your_email_id.com

GMAIL_APP_PASSWORD=your_password
GMAIL_APP_PASSWORD=your_password
GMAIL_EMAIL : - This id might be from different email providers( yahoo, gmail, outlook, etc). This email id will used to send otp.
GMAIL_APP_PASSWORD : - This is not your email account password, it is a App password.
Important Note About App Passwords for Gmail:
When using Gmail, you need to:
- Enable 2-Step Verification on your Google account
1.

2.

- Generate an App Password specifically for your application
- Use this App Password instead of your regular password
To generate an App Password for Gmail:
- Go to your Google Account settings (myaccount.google.com)
- Navigate to Security → 2-Step Verification
- Scroll down to "App passwords"

- Select "Mail" as the app and give it a name (e.g., "FlutterFlow OTP")
- Google will generate a 16-character password - use this as your 'pass' value
Note : - Now you have enabled 2-Step Verification and create App password, so add that password in .env file.
Step 4 : - Install some dependencies in your cloud function.
package.json
"dependencies": {

    "dotenv": "^16.4.7",

    "firebase-admin": "^12.1.0",

    "firebase-functions": "^5.0.0",

    "nodemailer": "^6.10.0"

  },
Commands to install dependencies :
- npm install dotenv. (For .env file)
- npm install firebase-admin.
- npm install nodemailer. (For sending mail)
Step 5 : - Add the below code in index.js file.
const functions = require('firebase-functions');

const admin = require('firebase-admin');

const nodemailer = require('nodemailer');

const serviceAccount = require('./mytesting-7cae3-firebase-adminsdk-bg0ir-1e888126db.json');


admin.initializeApp({

  credential: admin.credential.cert(serviceAccount)

});

require('dotenv').config();


// For local testing, set up environment variables

const gmailEmail = process.env.GMAIL_EMAIL || 'your-test-email@gmail.com';

const gmailPassword = process.env.GMAIL_APP_PASSWORD || 'your-test-app-password';


// Email configuration

const transporter = nodemailer.createTransport({

  service: 'gmail',

  auth: {

    user: gmailEmail,

    pass: gmailPassword

  }

});


// Function to send OTP email

exports.sendOTPEmail = functions.https.onCall(async (data, context) => {

  const { email, otp } = data;


  if (!email || !otp) {

    throw new functions.https.HttpsError(

      'invalid-argument',

      'Email and OTP are required'

    );

  }


  console.log(`Sending OTP ${otp} to ${email}`);


  const mailOptions = {

    from: `Your App <${gmailEmail}>`,

    to: email,

    subject: 'Your Login Code',

    html: `

      <div style="font-family: Arial, sans-serif; padding: 20px; text-align: center;">

        <h2>Your Login Code</h2>

        <p>Use the following code to sign in to your account:</p>

        <div style="font-size: 24px; font-weight: bold; letter-spacing: 5px; margin: 20px 0; padding: 10px; background-color: #f0f0f0; border-radius: 5px;">${otp}</div>

        <p>This code will expire in 15 minutes.</p>

      </div>

    `

  };


  try {

    await transporter.sendMail(mailOptions);

    console.log('Email sent successfully');

    return { success: true };

  } catch (error) {

    console.error('Error sending email:', error);

    throw new functions.https.HttpsError('internal', 'Error sending email');

  }

});


exports.generateCustomToken = functions.https.onCall(async (data, context) => {

    const { email } = data;


    if (!email) {

      throw new functions.https.HttpsError(

        'invalid-argument',

        'Email is required'

      );

    }


    try {

      // Check if user exists in Firebase Auth

      let uid;

      try {

        const userRecord = await admin.auth().getUserByEmail(email);

        uid = userRecord.uid;

      } catch (error) {

        // User doesn't exist, create a new user

        const newUser = await admin.auth().createUser({

          email: email,

          emailVerified: true, // Since we verified with OTP, we can set this to true

        });

        uid = newUser.uid;


        // Optionally create initial user data in Firestore

        await admin.firestore().collection('users').doc(uid).set({

          email: email,

          createdAt: admin.firestore.FieldValue.serverTimestamp(),

        });

      }


      // Generate custom token

      const token = await admin.auth().createCustomToken(uid);


      return { token };

    } catch (error) {

      console.error('Error generating custom token:', error);

      throw new functions.https.HttpsError('internal', 'Error generating authentication token');

    }

  });
Note : - Add the path of your service account json file.

Step 6 : - Deploy Cloud Function.
Run the command to deploy the project to Firebase:
firebase deploy
After deployment completed, you will get 2 apis for this cloud function.
- sendOTPEmail.
Method : - POST

Header : - Content-Type:application/json

Body : - {

  "data": {

    "email": "email",

    "otp": "otp"

  }

}

**Response**


{

    "result": {

        "success": true

    }

}
- generateCustomToken.
Method : - POST

Header : - Content-Type:application/json

Body : - {

  "data": {

    "email": "email"

  }

}

**Response**


{

    "result": {

        "token": "eyJhbGciOiJSUzI1NiIsInR5----------Custom Token-----"

    }

}
Custom Action
- generateRandomOTP : - Use this custom action to generate 5 digit random number, which we will pass in sendOTPEmail api as a otp parameter
import 'dart:math';


Future<String> generateRandomOTP() async {

  // Add your function code here!

  Random random = Random();

  int randomOTP = 10000 + random.nextInt(90000);

  return randomOTP.toString();

}
- signInOrCreateUser : - This custom action is used to signIn or create user account with the help of custom token. we will get custom token by generateCustomToken api and pass that custom token to signInOrCreateUser as a parameter.
import 'package:firebase_auth/firebase_auth.dart';


Future signInOrCreateUser(String token) async {

  // Add your function code here!

  return await FirebaseAuth.instance.signInWithCustomToken(token);

}
Follow the below steps to implement Apis and Custom function functionality in Flutterflow
Step 1 : - In Auth Page, Send Otp button action flow
- Action 1 : - Call generateRandomOTP custom action to get otp number.
- Action 2 : - Stored the otp number in App State variable named as otpValue(String) also stored email in App State variable named as email(String) from widget state.
- Action 3 : - Call sendOTPEmail api and pass email and otpValue as a parameter. This api send the otp number to given email address.
- Action 4 : - If api is success than navigate to Otp Page.
- Action 5 : - If api is failed than show alert.

Step 2 : - In Otp Page, Submit button action flow.
- Conditional Action 1 : - Entered otp is correct or not. ( otpValue ( App State ) == PinCode ( Widget state ) ) .
- Action 1 : - If otp is matched than call the generateCustomToken api, it will give custom token as a response.
- Action 2 : - If otp not matched than shoe alert like “ otp not matched ”.
- Conditional Action 2 : - Check the api generateCustomToken success or not.
- Action 3 : - If api success than call signInOrCreateUser custom action, This action is used to sign in or create user account with the help of custom token.

Conclusion
Implementing Email OTP authentication in FlutterFlow using Firebase enhances security by allowing passwordless sign-ins. This guide covered setting up a FlutterFlow project, integrating Firebase authentication, and configuring a cloud function to generate and verify OTPs. By leveraging Firebase's authentication features and custom actions, users can seamlessly log in with a one-time password sent to their email. Deploying cloud functions ensures secure email verification and token generation, making the authentication process efficient and user-friendly.


.png)
.png)


.png)

.png)
.png)

.png)
.png)
.png)

.png)


.png)
.png)


.png)
.png)
.png)


.png)
.png)
.png)

.png)
.png)
.png)

.png)
.png)
.png)


.png)
.png)
.png)
.png)
.png)
.png)
.png)
.png)


Ready to develop your own product? Get in touch today!
Get in Touch
